
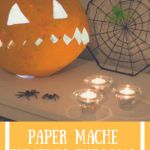
Learn how to make a paper mache pumpkin with newspaper and a balloon in this easy Halloween craft tutorial for kids.

This post contains affiliate links and I may receive a small commission if you visit a link and buy something. Purchasing via an affiliate link doesn't cost you any extra, and I only recommend products and services I trust. I may have been sent some of the products in this post free of charge or paid to feature them here. Thank you for supporting this blog.
Jump to:
- Why Make A Paper Mache Pumpkin?
- What You'll Need
- How Long Does A Paper Mache Pumpkin Take To Make?
- Instructions
- Step 1: Prepare Your Work Area
- Step 2: Tear The Newspaper
- Step 3: Make The Paper Mache Paste
- Step 4: Make Your Pumpkin Shape
- Step 5: Get Ready To Get Messy!
- Step 6: Add The First Layer Of Paper Mache
- Step 7: Build Up The Paper Mache Layers
- Step 8: Leave The Pumpkin To Dry Completely
- Step 9: Remove The Balloon
- Step 10: Create A Jack-O'-Lantern Face
- Step 11: Paint Your Paper Mache Pumpkin
- Step 12: Light Up Your Paper Mache Pumpkin
- Tips For Making The Best Paper Mache Pumpkin
- Can You Make A Paper Mache Pumpkin Without A Balloon?
- How To Make Your Pumpkin Smoother
- Can Children Make Paper Mache Pumpkins?
- Paper Mache Pumpkin FAQs
- How To Store Your Pumpkin For Next Halloween
- Shop this post
If you're looking for an easy Halloween craft that you can bring out year after year, this DIY paper mache pumpkin is such a fun one to make. All you really need is a balloon, newspaper, flour and water, plus a little paint to turn it into your own homemade jack-o'-lantern.
I love making seasonal crafts with my kids, and we originally made this paper mache pumpkin because we wanted more Halloween decorations for the house. There are only so many real pumpkins you can carve, and I loved the idea of making something we could keep rather than throw away at the end of Halloween.
It's also a brilliant half-term activity because most of the materials can be found around the house or in your recycling bin. The actual crafting is simple, although you will need to allow plenty of drying time between stages.
This tutorial shows you exactly how to make a paper mache pumpkin using a balloon, including how to create those lovely pumpkin ridges, make a stem, paint it and turn it into a reusable Halloween lantern.
This post contains affiliate links and I may receive a small commission if you visit a link and buy something. Purchasing via an affiliate link doesn't cost you any extra, and I only recommend products and services I trust. I may have been sent some of the products in this post free of charge or paid to feature them here. Thank you for supporting this blog.
Why Make A Paper Mache Pumpkin?
There are lots of things I love about this particular Halloween craft.
It's inexpensive, uses lots of materials you probably already have at home and gives children plenty of opportunity to get messy and creative.
Unlike a real pumpkin, your finished papier mâché pumpkin won't rot either. If you look after it and store it somewhere dry, you can bring it out again next Halloween.
You can also completely change the look depending on how you decorate it. Make a traditional orange jack-o'-lantern like ours, paint it white for more neutral autumn decor or create black, pink, metallic or pastel pumpkins.
And because you make the shape yourself, every pumpkin turns out slightly different.
What You'll Need
- Flour
- Water
- Balloon
- Newspaper
- String
- Toilet paper roll
- Tape
- Disposable Gloves
- Paint in your chosen colours
- Electric LED tea light
- Bowl for supporting the balloon
- Paintbrush
- Marker pen
- Scissors or craft knife
You can also use slightly watered-down PVA glue instead of homemade flour paste.
If children are helping, choose washable paints and glue where possible and protect clothes and surfaces before you start. Paper mâché is wonderfully messy!
How Long Does A Paper Mache Pumpkin Take To Make?
The hands-on part of this craft doesn't take particularly long, but drying is where you'll need some patience.
I would allow at least a couple of days from start to finish rather than planning to make your pumpkin in one afternoon. Drying time will vary depending on how large your pumpkin is, how wet your paper is and how warm and humid your home is.
The most important thing is not to rush it. Your papier mâché needs to be completely dry and hard before you remove the balloon.
Instructions
Step 1: Prepare Your Work Area
Paper mâché is messy, especially when children are involved, so cover your table before you start.
An old wipe-clean tablecloth works perfectly. You could also use opened-out recycling bags or sheets of cardboard.
Put all your materials within easy reach and find a bowl that will comfortably hold your inflated balloon. Sitting the balloon in a bowl makes applying the newspaper much easier because it won't constantly roll away from you.

Step 2: Tear The Newspaper
Tear your newspaper into small strips or squares.
Tearing rather than cutting the newspaper gives you softer edges, which tend to blend together more easily as you build up the layers.
Prepare plenty before you start because you'll be surprised by how much newspaper a large pumpkin needs.
This is a good job to give younger children while you prepare the paste.

Step 3: Make The Paper Mache Paste
You can make a really simple paper mache paste with plain flour and water.
Add flour to a bowl and gradually mix in water until you have a smooth paste. You're looking for a consistency that's runny enough to coat the newspaper but thick enough to stick it to the balloon.
If it's too thick, add a little more water. If it's very watery and running straight off the newspaper, add a little more flour.
Whisk out as many lumps as possible.
Alternatively, use slightly watered-down PVA glue. This is particularly handy if you don't want to make flour paste.
Whichever method you use, don't make the newspaper excessively wet. Too much paste makes the pumpkin take much longer to dry.

Step 4: Make Your Pumpkin Shape
Blow up your balloon to roughly the size you want your finished paper mache pumpkin to be. We made ours around the size of a beach ball.
Now comes the clever part.
Tie string tightly around the balloon so that it gently presses into the sides. Space the string around the balloon to create sections.
These indentations give an ordinary round balloon a much more realistic pumpkin shape.
Don't worry if all the sections aren't identical. Real pumpkins aren't perfectly symmetrical either, and slightly uneven ridges can actually make the finished pumpkin look more natural.
For the stalk, cut a toilet roll tube down to the size you want and tape it securely to the top of the balloon.

Step 5: Get Ready To Get Messy!
Place the prepared balloon into a bowl so that it stays still while you're working.
Pop on your disposable gloves if you don't like the feel of paper mâché paste on your hands.
This is definitely one of those crafts where embracing the mess is part of the fun.

Step 6: Add The First Layer Of Paper Mache
Dip a piece of newspaper into your paste and use your fingers to gently remove the excess.
The newspaper should be coated but not dripping.
Smooth it onto the balloon, following the contours created by the string.
Continue adding pieces of newspaper, slightly overlapping each one so you don't leave any gaps.
Work your way around the entire balloon.
Leave an area at the bottom that can later be opened up to remove the balloon and create a flat base.

Step 7: Build Up The Paper Mache Layers
One layer of newspaper won't be strong enough once the balloon is removed, so you'll need to build up several layers.
Aim for around three or four layers for a sturdy paper mache pumpkin.
One of the easiest ways to keep track is to change the direction of the newspaper as you add each layer. For example, lay one layer mostly horizontally and the next vertically.
If your pumpkin is becoming very wet, stop and let it dry before adding more.
Thin layers will dry more evenly than lots of very wet paper added at once.
Pay particular attention to the area around the stem and the bottom of the pumpkin as you want these areas to feel reasonably sturdy.

Step 8: Leave The Pumpkin To Dry Completely
This is the stage where patience pays off.
Put your pumpkin somewhere warm and well ventilated and leave it until the paper feels completely hard and dry.
Ours dried well in a warm spot near a radiator, but avoid putting the balloon directly against a strong heat source.
A small pumpkin might dry overnight, while a large or particularly wet one can take considerably longer.
Turn the pumpkin occasionally if you can so air reaches different areas.
Don't move on to the next stage if you can still feel soft, cold or damp patches. Removing the balloon too soon can cause the paper mache shell to collapse.

Step 9: Remove The Balloon
Once the paper mache is completely dry, carefully cut an opening in the bottom.
This opening does two jobs: it allows you to remove the balloon and gives your pumpkin a flat base to sit on.
Pop or deflate the balloon and gently pull it out through the opening.
Don't worry if you hear the paper crack slightly as the balloon pulls away from the inside. As long as you've used several layers and allowed them to dry thoroughly, the shell should hold its shape.
If you find a weak spot, simply patch it with another couple of pieces of newspaper and paste and leave it to dry again.

Step 10: Create A Jack-O'-Lantern Face
Now comes the really fun part.
Draw your pumpkin's face onto the front using a pencil or marker.
You can make a traditional jack-o'-lantern with triangle eyes and a toothy grin, a friendly pumpkin for younger children or something much spookier.
When you're happy with the design, cut out the features using scissors or a craft knife.
An adult should always do this part when making the craft with children.
You don't have to cut a face into your pumpkin at all. If you prefer an autumn decoration rather than a Halloween jack-o'-lantern, simply leave it whole and paint it.

Step 11: Paint Your Paper Mache Pumpkin
Now your pumpkin really starts to come to life.
We used poster paint, which is ideal when crafting with children. Acrylic paint also gives a lovely finish.
You may find that newspaper print shows through your first coat. If so, either add another coat of orange or paint the pumpkin white first and use that as a base coat.
Don't feel limited to orange either.
Try:
- White and cream for neutral autumn decor
- Black for a dramatic Halloween pumpkin
- Metallic gold or copper
- Pastel colours
- Different shades of orange
- Green for a slightly witchy pumpkin
- Patterns, spots or stripes
You can emphasise the pumpkin's ridges with a slightly darker shade of paint and add lighter highlights to the raised sections.
Paint the toilet roll stem brown or green. You could also wrap it with brown paper, add twine or use hot glue to create more texture.

Step 12: Light Up Your Paper Mache Pumpkin
Once all the paint is completely dry, pop an electric tea light inside.
The light will shine through the face and turn your homemade pumpkin into a brilliant little Halloween lantern.
Never use a real candle or any other naked flame inside a paper mache pumpkin. Paper and cardboard are flammable, so stick to battery-operated LED lights.
Place it on a windowsill, shelf or as part of your Halloween display.
If you're looking for more ideas for decorating the house, take a look at these Halloween decoration ideas too.
Tips For Making The Best Paper Mache Pumpkin
After making one yourself, there are a few things that make the whole process much easier.
Don't use too much paste
Run each strip between your fingers to remove excess paste before putting it onto the balloon. Very soggy paper takes much longer to dry and can make your pumpkin lumpy.
Use several thin layers
Three or four reasonably thin layers will create a much stronger shell than one thick, soggy layer.
Let it dry properly
This is probably the most important tip. If the paper still feels damp, leave it longer.
Make several at once
Once you've got the paste out, you might as well make a little collection. Use different-sized balloons to create a family of pumpkins.
Don't aim for perfection
A few wrinkles and uneven sections actually suit pumpkins. This is a homemade Halloween decoration, so it doesn't need to look perfectly smooth.
Make the base flat
Before painting, check that your pumpkin sits securely. You can carefully trim the opening underneath if necessary.
Can You Make A Paper Mache Pumpkin Without A Balloon?
Yes. If you don't have balloons, you can create a temporary pumpkin shape using scrunched-up newspaper inside a plastic bag.
Shape the filled bag into a ball and tie string around it to create pumpkin-like ridges before covering it with paper mâché.
Once everything has dried, cut an opening and remove the filling.
I still like the balloon method because it gives you a lovely rounded shape and is easy for children to understand, but it's useful to know there is an alternative.
How To Make Your Pumpkin Smoother
If you'd prefer a smoother finish, make sure each piece of newspaper is pressed down firmly when you apply it and wipe away excess paste.
Once the pumpkin is completely dry, you can gently smooth particularly rough areas before painting.
A white base coat can also help disguise the newspaper print and give your final colour a more even finish.
Personally, I quite like the slightly uneven finish because it makes the pumpkin look handmade.
Can Children Make Paper Mache Pumpkins?
Absolutely. Paper mâché is a lovely sensory craft for children and there are plenty of stages they can do themselves, including tearing newspaper, dipping and smoothing the paper and painting the finished pumpkin.
Younger children will need help shaping the balloon and should always leave any cutting with a craft knife to an adult.
If you want a much quicker pumpkin activity without the messy paste or drying time, try my tutorial showing How To Make Paper Pumpkins instead.
You might also like these Halloween Crafts - Pipe Cleaner Monsters for another easy Halloween activity.
Paper Mache Pumpkin FAQs
How many layers of paper mache do you need for a pumpkin?
Around three to four layers is a good target. You need enough paper for the pumpkin to keep its shape when the balloon is removed.
How long does a paper mache pumpkin take to dry?
Allow at least overnight, and potentially 24 hours or longer for a large pumpkin. Drying time depends on the number of layers, how much paste you've used and the temperature and humidity in your home.
Why has my paper mache pumpkin collapsed?
The most likely causes are removing the balloon before the paper is completely dry or not using enough layers. Patch any damaged areas with fresh newspaper and paste and leave them to dry completely.
Can you use PVA glue for paper mache?
Yes. Slightly watered-down PVA glue works well if you don't want to make flour-and-water paste.
What paint is best for paper mache pumpkins?
Poster paint works well for children's crafts, while acrylic paint gives good coverage and is useful if you want a more decorative finish. We used poster paint for ours.
Can I put a candle inside a paper mache pumpkin?
No. Never put a real candle or naked flame inside a paper or cardboard pumpkin. Use a battery-operated LED tea light instead.
Can paper mache pumpkins be used outside?
I would treat these primarily as indoor decorations. Ordinary flour-and-newspaper paper mâché isn't waterproof, so rain or damp conditions can ruin it. They can be put outside temporarily in dry weather, but bring them back indoors afterwards.
How To Store Your Pumpkin For Next Halloween
One of the best things about making a paper mache pumpkin rather than carving a real one is that you can use it again.
Make sure it is completely clean and dry before storing it. Wrap it loosely in tissue paper and place it in a cardboard box somewhere dry.
Avoid squashing it underneath heavy decorations because although paper mâché is surprisingly sturdy, it can still be crushed.
Get it out again next October and you have one less Halloween decoration to make!
The girls absolutely loved making this craft, and I still think it's such a fun way to create your own Halloween decorations. It's inexpensive, creative and gives you something you can keep rather than throwing away once Halloween is over.
If you're planning a whole afternoon of Halloween crafting, have a look at my other Halloween craft ideas too.
And don't forget to save this paper mache pumpkin tutorial to Pinterest so you can find it when October rolls around!
Shop this post
 Buy Now →
 Buy Now →
 Buy Now →
 Buy Now →
 Buy Now →
 Buy Now →
 Buy Now →

If you enjoyed this post about how to make a paper mache pumpkin, share it with your friends or on social media and don't forget to save it to Pinterest!

You might also enjoy these other Halloween posts...


Erica Price says
Really clever to make the ridges with string.
Milli gRace says
This is a great idea - it looks so fun and less smelly than a real pumpkin!
Angela says
What a fantastic idea. I bet Sylvia would love to do this with me. It's a fab tutorial thanks.
stephanie says
What a great idea and a fun thing to do with the children - I've got my niece and nephew next weekend, I may have to do this with them as well x
StressedMum says
Looks like you had great fun and the finished result is great x
Jenni - Odd Socks and Lollipops says
Oh what a fab idea! It looks like such fun. I will have to give this a go with Boo, she will love it
Nikki says
Wow these look fab! So effective too! Halloween is one of my favourite times of the year!
Lyndsey says
Aww bless the pumpkins look amazing I will need to turn my sister on to this idea with her two!
L x
Rhian Westbury says
I am so bad with paper mache, I always make a massive mess. But these have come out so good x
francesca says
Oh thats so cool and way more kid freindly than carving a pumpkin!! I should do this with mine!!
Dannii @ Hungry Healthy Happy says
How fun is this! I can't wait to be able to do crafts like this with my little one.
Anna nuttall says
Such a cool idea. Love Halloween craft. I should do this with my niece. xx
Emily Leary says
That's so cute! My kids would love it and it looks nice and easy too.
Tara says
I love Halloween crafts, this looks so fun haha
Milly Youngman says
This looks so fun to make! I love a bit of Halloween crafting!
Nayna Kanabar says
What a wonderful idea and it looks so lovely all lit up.
fashion-mommy says
I absolutely love this idea. Paper Mache is so much fun and really cheap to do.
Sarah Bailey says
Such a great idea! Paper Mache can be so much fun!
Zena's Suitcase says
This looks so much fun. My girls would love to make this so pinning for an activity for them
Hannah says
This is such a good idea - I'll have to do this myself xx
Harriet from Toby & Roo says
I keep trying to persuade my boys to do some paper mache with me but they don't have the patience!
Ickle Pickle says
I love this - what a great idea. Halloween is one of my favourite times of year 🙂 Kaz x
RachelSwirl says
Wow this looks fab, fun to make and won't stink the house out!
Annie B says
This totally beats buying an actual pumpkin that will last a few days! Also it's always great fun for you and the kids!
Charli Bruce says
This is a brilliant idea, definitely going to be doing this with my daughter as soon as half term starts! xx
Lubka Henry says
This is a very cool idea and quite interesting to make. Must be a very enjoyable activity for the little ones 🙂
Dani says
Ahh this is great, I might even make myself one this Halloween! 🙂
Dani x