
Learn how to make paper pumpkins with this easy 3D autumn craft for kids, Halloween and fall decorating.

This post contains affiliate links and I may receive a small commission if you visit a link and buy something. Purchasing via an affiliate link doesn't cost you any extra, and I only recommend products and services I trust. I may have been sent some of the products in this post free of charge or paid to feature them here. Thank you for supporting this blog.
Jump to:
- Why You'll Love These Paper Pumpkins
- How To Make Paper Pumpkins
- YouTube Tutorial
- How Long Does This Craft Take?
- Tips For Making Paper Pumpkins With Children
- Paper Pumpkin Variations
- How To Decorate With Paper Pumpkins
- More Pumpkin and Halloween Crafts
- Useful Craft Supplies
- Frequently Asked Questions
- Shop this post
These easy paper pumpkins are one of my favourite simple autumn crafts to make with children. They are inexpensive, don't require lots of specialist craft supplies and look really effective when they're finished.
Made from strips of orange paper, these 3D paper pumpkins are perfect for decorating the house for autumn or Halloween. Make one on its own or create several in different sizes and group them together for a really cute pumpkin display.
The actual construction is straightforward too, making this a lovely paper pumpkin craft for children who are confident using scissors and glue, with adult help where necessary.
Why You'll Love These Paper Pumpkins
There are lots of elaborate Halloween crafts out there, but sometimes the simplest ones are the most enjoyable.
These paper pumpkins are:
- inexpensive to make
- easy to customise
- a great autumn craft for children
- useful as homemade Halloween decorations
- easy to make in different sizes
- a good way to use leftover coloured or scrapbook paper
- quick enough for an afternoon craft activity
They're also much less messy than carving a real pumpkin!
You don't need much to make these paper pumpkins and you may already have most of the supplies in your craft cupboard.
You will need:
- Orange coloured paper or lightweight cardstock
- Green coloured paper
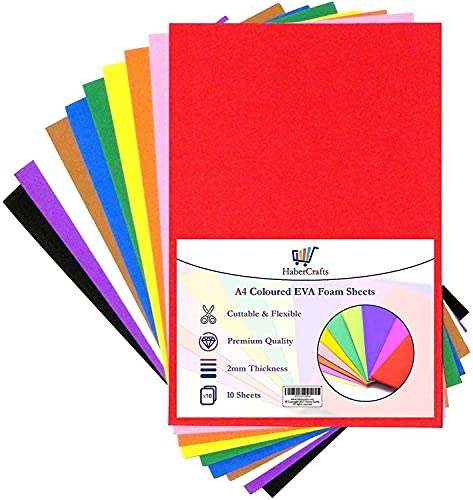
- Orange craft foam sheet
- PVA glue or glue stick
- Hot glue gun and glue sticks
- Scissors or paper cutter
- Ruler
- Small twig for the pumpkin stalk
- Pencil
Optional:
- Paper fasteners
- Green pipe cleaners
- Patterned or scrapbook paper
- Black paper if you want to add a jack-o'-lantern face

What is the best paper to use?
Standard coloured craft paper works well for smaller paper pumpkins. If you're making a larger pumpkin, lightweight cardstock is a good choice because it holds its shape more easily.
Construction paper is another option if you're making these with children.
Scrapbook paper can look really lovely too, particularly if you want to make paper pumpkins that feel more like autumn decorations than a children's Halloween craft.

How To Make Paper Pumpkins
Step 1 - Cut the paper into strips
Cut your orange paper into strips approximately 1 cm x 17 cm.
Try to make all of the strips roughly the same width and length so that your finished pumpkin has an even, rounded shape.
A paper cutter makes this really quick, but a ruler, pencil and scissors work perfectly well too.

Step 2 - Glue the strips together at one end
Gather one end of your paper strips together.
Arrange them so that they can fan out evenly into a circle and glue the ends on top of one another.
I like to use PVA glue for this part, although a glue stick will also work. If the pieces keep moving while the glue dries, a paper fastener can make assembling the pumpkin easier.

Step 3 - Create the pumpkin shape
Fan the strips out evenly.
Bring the loose ends upwards and gather them together at the top of the pumpkin.
Glue these ends together in the same way as you did at the bottom.
You should now have a rounded 3D paper pumpkin shape.
Spend a little time adjusting the individual paper strips so that they're evenly spaced around the pumpkin. This makes a big difference to the finished result.

Step 4 - Make the top of the pumpkin
Draw a small flower or leafy shape onto the orange foam sheet and cut it out.
Make a small hole in the centre. This will sit at the top of the pumpkin and help to hold the stalk in position.
If you don't have craft foam, you could make this part from thick card instead.

Step 5 - Add the pumpkin stalk
Cut a small twig to approximately 2 cm long.
Push the twig through the hole you have made in the foam.
Using a real twig gives these paper pumpkins a lovely rustic look, but you don't have to use one. A piece of brown card, a craft stick or a short piece of pipe cleaner will work too.

Step 6 - Attach the stalk
Ask an adult to use a hot glue gun to attach the foam and twig to the top of the pumpkin.
Hot glue works particularly well here because it sets quickly and keeps the stalk firmly in position.
If children are making the craft themselves, use a child-safe craft glue instead and allow plenty of time for it to dry.

Step 7 - Make the leaves
Draw two small leaf shapes onto green paper and cut them out.
Glue the leaves around the base of the pumpkin stalk.
For an extra detail, cut a very thin strip of green paper and wrap it tightly around a pencil. Slide it off and you'll have a curly paper pumpkin vine to glue beside the leaves.

Step 8 - Finish your paper pumpkin
Adjust the paper strips one last time until you're happy with the shape.
Your paper pumpkin is finished!

YouTube Tutorial
If you find it easier to watch a tutorial video, I have made one for my craft YouTube channel, Things To Make And Do.

How Long Does This Craft Take?
Allow around 20-30 minutes to make one paper pumpkin, although drying time will depend upon the type of glue you're using.
Once you've made the first one, the others are much quicker because you can use your original paper strips as a guide when cutting the next batch.
Tips For Making Paper Pumpkins With Children
This is a lovely autumn craft for children, but you can make a few changes depending on their age.
Pre-cut the paper strips for younger children so they can concentrate on assembling and decorating their pumpkin.
Use a glue stick or PVA glue rather than hot glue when children are doing the sticking themselves.
For older children, measuring and cutting equal paper strips is a useful part of the activity and gives them a chance to practise measuring accurately.
Scissors and hot glue guns should always be used with appropriate adult supervision.
Paper Pumpkin Variations
One of the best things about this craft is how easily you can change the finished look.
Make mini paper pumpkins
Use shorter and narrower paper strips to create little pumpkins. A collection of mini pumpkins would look lovely scattered along a mantelpiece or autumn table.
Make pumpkins in different colours
Pumpkins don't have to be bright orange.
Try cream, white, pale pink, mustard, rust or even black paper for a more modern Halloween display.
Use patterned paper
Scrapbook paper gives these pumpkins a completely different look. Autumn florals, gingham, polka dots and vintage-style prints all work well.
Make a jack-o'-lantern
Cut eyes, a nose and a mouth from black paper and glue them onto the front of your pumpkin.
It's an easy way to turn the same paper pumpkin craft into a more traditional Halloween activity.
Add curly vines
Wrap thin strips of green paper around a pencil and then carefully slide them off. The paper should stay curled and can be glued next to the pumpkin stalk.
You can also use a green pipe cleaner for the same effect.
Make a pumpkin patch
Make several pumpkins in different sizes and shades of orange, then arrange them together to create a miniature indoor pumpkin patch.
How To Decorate With Paper Pumpkins
These little pumpkins aren't just a children's craft. They make inexpensive homemade autumn decorations too.
Try using them:
- on a Halloween party table
- along a mantelpiece
- on an autumn shelf display
- as Thanksgiving table decorations
- as part of a Halloween centrepiece
- in a child's bedroom
- as classroom Halloween decorations
- grouped together to create a pumpkin patch
I particularly like them displayed in groups of three, using a large, medium and small pumpkin.
Because they're made from paper, they're also easy to store once Halloween is over. Keep them somewhere dry and you may be able to bring them out again next autumn.
More Pumpkin and Halloween Crafts
If you've enjoyed making these paper pumpkins, you might also like my DIY paper mache pumpkin tutorial. It's a brilliant project if you want to make a larger homemade Halloween decoration.
For something a little different, try this melted crayon pumpkin DIY, which is a colourful no-carve alternative to decorating a traditional pumpkin.
You can also make your own Halloween bunting flags to go alongside your pumpkins for a complete homemade Halloween display.
And if you're planning a Halloween party after your crafting session, these free printable Halloween charades cards are another easy activity to have ready.
Useful Craft Supplies
If you need to stock up before making your paper pumpkins, these are the supplies I find most useful for this sort of project:
- Orange cardstock on Amazon UK
- PVA craft glue on Amazon UK
- Hot glue gun on Amazon UK
- Paper cutters on Amazon UK
- Green pipe cleaners on Amazon UK
Frequently Asked Questions
Can I make paper pumpkins without a glue gun?
Yes. The main pumpkin can be assembled using PVA glue, a strong glue stick or paper fasteners. The hot glue gun is particularly useful for attaching the twig stalk, but strong craft glue can be used instead. Just allow extra drying time.
Can I use cardstock to make paper pumpkins?
Yes. In fact, cardstock is particularly useful when you're making larger paper pumpkins because it holds the rounded shape well. For smaller pumpkins, ordinary coloured craft paper is usually sufficient.
How do you make different-sized paper pumpkins?
Simply change the dimensions of your paper strips. Longer strips create a larger pumpkin, while shorter strips make mini pumpkins. Keep all of the strips for each individual pumpkin the same size so that the finished shape stays even.
How many paper strips do I need?
There isn't one exact number because it depends on how full you want your pumpkin to look. Start with around eight strips and add more if you want a fuller, more closely ribbed pumpkin.
Can young children make this paper pumpkin craft?
Yes, with a little preparation. An adult can cut the strips beforehand and children can help arrange, glue and decorate them. Avoid allowing young children to use a hot glue gun.
Can I make these for Halloween and Thanksgiving?
Absolutely. Orange paper pumpkins work for both, but you can make them look less Halloween-specific by using cream, rust, brown or patterned paper and leaving off any jack-o'-lantern faces.
I love crafts like these because they prove that you don't need expensive supplies or complicated instructions to make lovely seasonal decorations.
Once you know how to make paper pumpkins, it's easy to make a whole collection. Experiment with different sizes, colours and patterned papers and create a little pumpkin display that you can bring out every autumn.
If you make these paper pumpkins, I'd love to know how yours turned out. And don't forget to save this tutorial on Pinterest so you can find it again when autumn comes around.
If you liked this paper pumpkin craft, share it with your friends and Pin it for later along with your other DIY projects and simple paper crafts...

Shop this post
 Buy Now →
 Buy Now →
 Buy Now →
 Buy Now →
 Buy Now →
 Buy Now →
 Buy Now →

You might also like these other halloween crafts...
Paper Mache Pumpkin Tutorial - Halloween Craft


Leave a Reply